
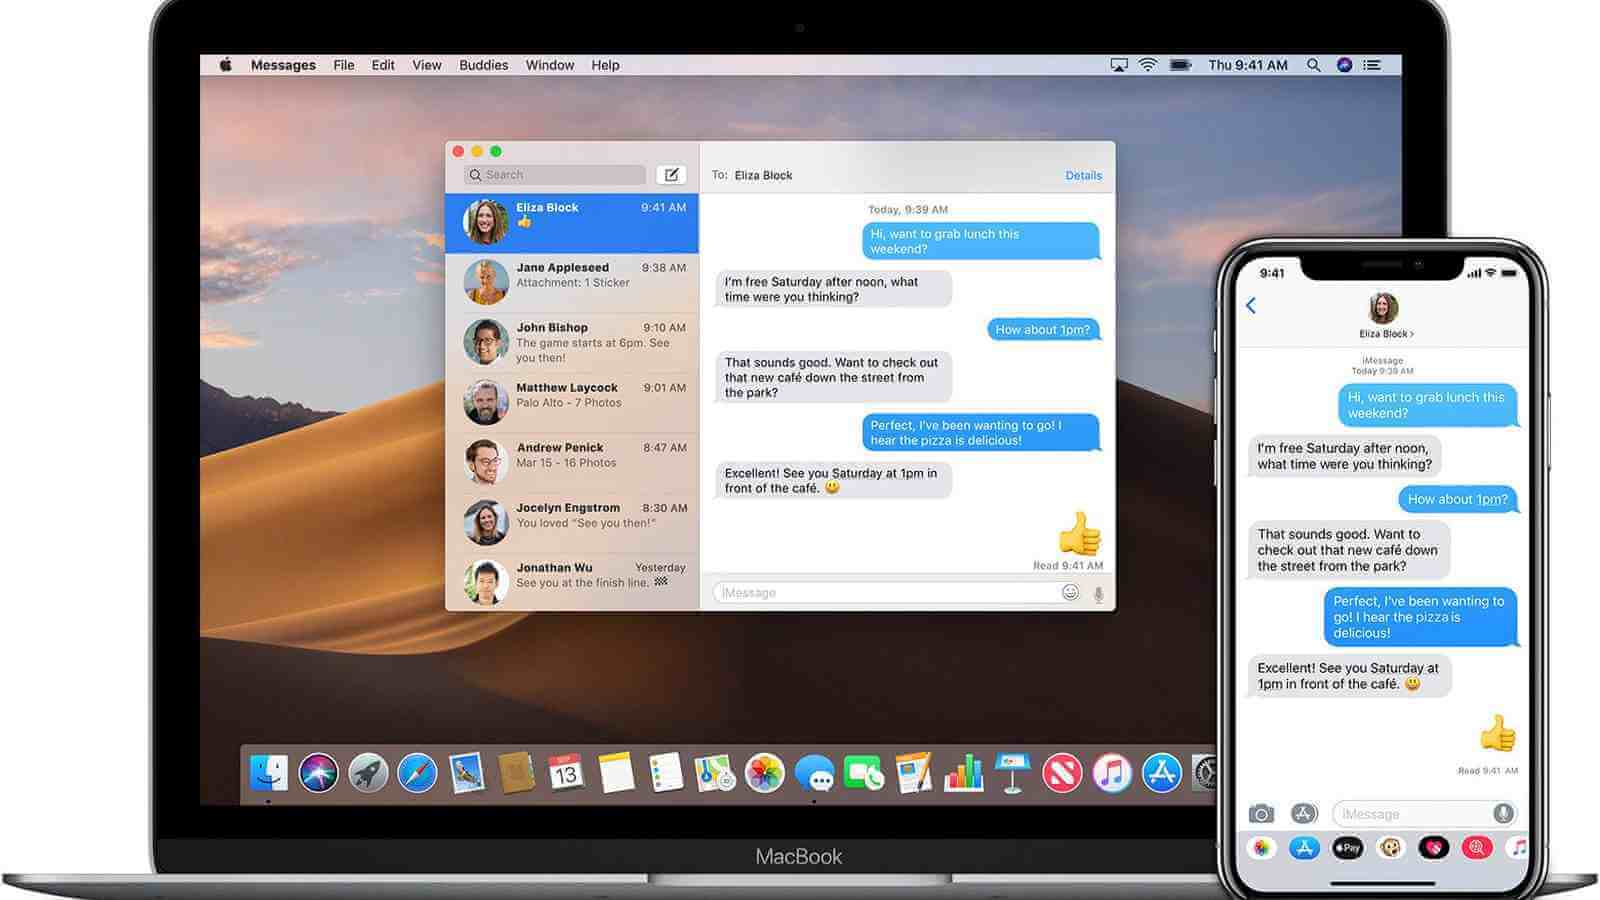
This article will show you how to recover deleted iMessages on Mac in different ways for different situations. iMessage is a great instant messaging service, allowing us to conveniently send texts, images, and videos, among others, to other Apple device users. What if your messages, conversations, or even database have been deleted by accident? Don’t panic. This guide will help you out.
Contents
How to Recover Deleted iMessages on Mac without backup
If the Messages folder, iMessages, or attachments have been deleted or lost, the best solution is to restore them from the backup. But in many cases, there are no backups available. Is it possible to recover deleted iMessages on Mac without backup? The answer is yes.
Before you get started, it’s important to know how and where they are stored. Mac computers using macOS Sierra or earlier by default will store iMessages on hard drives. macOS High Sierra, Mojave, and Catalina keep your messages too if you haven’t chosen to keep your messages in iCloud. In addition, even if Message is enabled in iCloud, you can still set your Mac to store your messages.
Where are iMessages stored on Mac?
In Finder, from the menu bar at the top of the screen, select Go > Go to Folder. In the Go to the folder field, enter ~/Library/Messages and click Go.

You will find two subfolders: Archive and Attachments. There are also a few database files such as chat.db.

One can find and recover these folders and files with the help of professional data recovery software like MacDeed Data Recovery.
Tip: If the abovementioned Go to the finder command doesn’t work for you, you can try this one: ~/Library/Containers/com.apple.iChat/Data/Library/Messages.
Recover deleted iMessages on Mac in 3 easy steps
Step 1. Download and install the program.
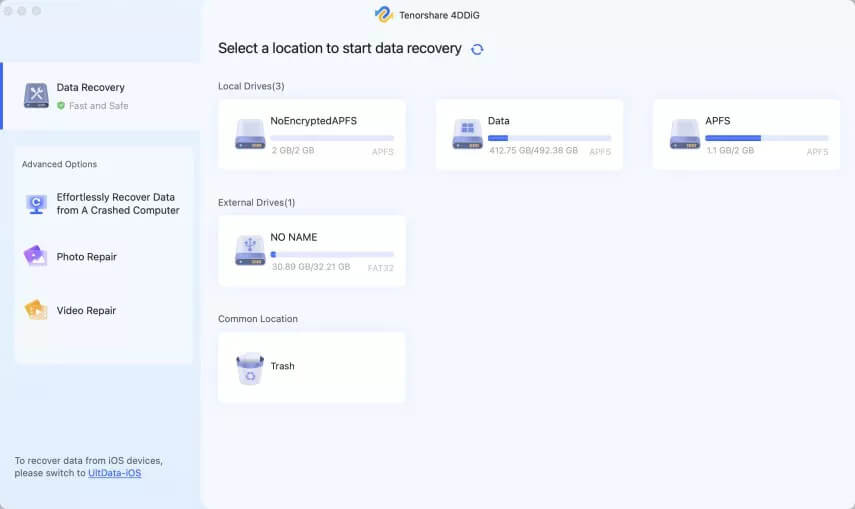
Step 2. Choose a disk/volume to scan
Once you select a solution, the Where did you lose your files window will appear. Choose a volume where your iMessages are stored. Click the Scan button in the upper right corner.
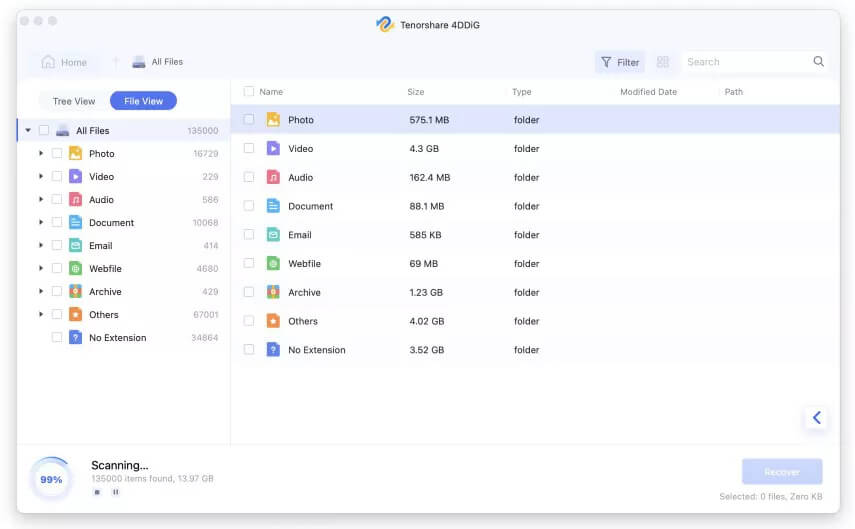
Step 3. Recover
Once the scan is finished, you can find the database files by entering filenames in the search box in the upper right corner of the interface. Select the checkboxes before the files you need to recover and click the Recover button.
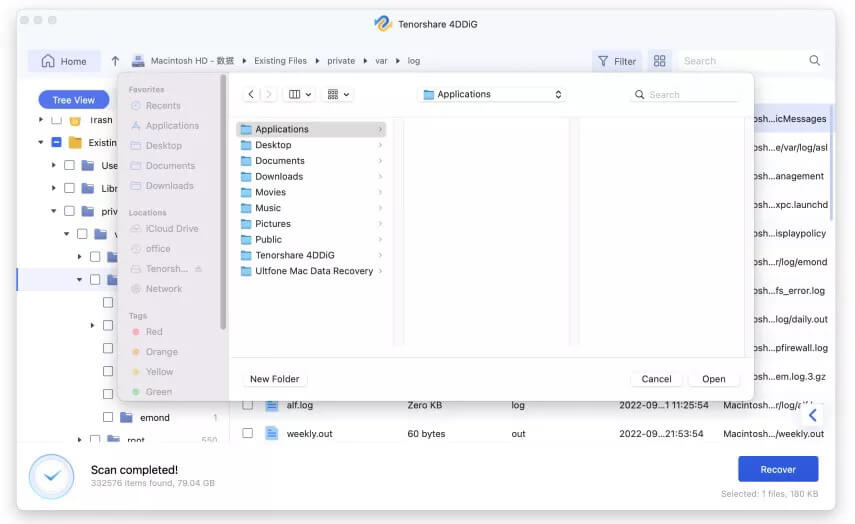
Once the database file is recovered, you should be able to see the deleted iMessages.
Important: Regardless of the way used to recover deleted iMessages on Mac (with or without backup), you need to restore the Messages database, which will replace the current database with an earlier one. As a result, you will likely lose the later conversations. So please back up the current iMessages on your Mac.
How to Recover deleted iMessages on Mac with backup
It’s a common practice for Mac users to back up their Macs using Time Machine, which is a great way to prevent data loss. If you do the backup on a regular basis, it’s very likely that you can recover deleted iMessages from iMac, MacBook, etc. with little loss. You will be able to get back the lost text messages, conversations, attachments, etc.
Step 1. In Messages, from the top menu bar, select Preferences > Accounts. Choose your account and click Sign out in the upper right corner of the Accounts window. Quit the app.
Step 2. Plug in your Time Machine external hard drive to Mac. Click the Time Machine icon in the menu bar and choose Enter Time Machine.
Step 3. Browse through the timeline and locate the backup time right before the messages were deleted. Go to Finder, navigate to the Messages folder, and select the database file chat.db. Click Restore.

As soon as it finishes restoring deleted iMessages on Mac, you can open the app and sign in again. Now you should find the messages you need.
Tip: Both methods allow you to easily restore the Messages folder on Mac as well.
How to Recover Deleted iMessages on Mac from iPhone or iPad
If you use iMessage with the same Apple ID on your Mac and iPhone/iPad without enabling iMessage in iCloud, you can still access the iMessage from your iDevice.
In such a case, you can easily get iMessages recovered by forwarding them to yourself from iPhone/iPad to Mac. The downside is that the message is not sent from the original sender. If you want to reply, you need to start a new conversion. But at least you still have the information you need. If you have enabled Messages in iCloud, you can try to save the day by disabling the function as soon as possible.
But if you find that your iMessages are deleted on your iPhone or iPad, you also can recover them from your iOS device by MacDeed iPhone Data Recovery, which is a professional tool to recover lost data from iPhone/iPad, iTunes, or iCloud.
Conclusion
How do I recover deleted iMessages on Mac? If you are asking a question like this, hopefully, this article can be helpful. Although you can effectively get back the deleted messages by using professional data recovery software, it would be best if the deletion had never happened in the first place. However, in reality, accidental deletion occurs a lot. The best practice is to regularly back up important folders on your Mac such as the Messages folder.
The Best Data Recovery Software for Mac – MacDeed Data Recovery
- Recover Messages database files, photos, audio, videos, docs, archives, etc.
- Support recovery of deleted, formatted, and lost files
- Support Mac’s internal storage, external HD, SD card, cloud storage, etc.
- Allow users to quickly scan, filter, preview, and recover data
- Recover files to a local drive or cloud platforms
- Easy to use, secure, read-only, and risk-free