

There are many reasons why you might want to format a USB drive on Mac, from its Mac compatibility to restoring its full capacity. Formatting a USB on Mac will definitely erase all files on it. So it’s highly recommended to back up USB files before formatting. In this article, I will show you how to format USB on Mac and find a solution to perform USB data recovery.
Contents
How to Format USB Drive on Mac?
To format a USB on Mac, the macOS built-in Disk Utility application can help. Follow the below steps to format a USB drive on Mac:
Step 1. Launch Disk Utility.
Connect your USB drive to your Mac. Go to Applications > Utilities, and open Disk Utility. Then you will see a list of available drives on the left. Choose the USB you want to format. And click the “Erase” button to continue.

Step 2. Choose a format for USB.
The second step to formatting USB on Mac is to choose a suitable format for it. Disk Utility chooses OS X Extended (Journaled) as the default format, but you can select other options according to your situation and then name your USB drive. The format options you’ll now see are:
OS X Extended (Journaled) – it is useful for creating secure drives that require a password to access. If you don’t want anyone to access the contents of the drive without your permission, this format is your choice, especially for removable drives like external drives and USB keys.
OS X Extended (Case-Sensitive, Journaled) – if you choose this format, you can create a case-sensitive drive where lower-case and upper-case files on a drive are treated differently. So a file named XXX.txt and xxx.txt would be treated as two separate files.
MS-DOS (FAT) – if you want the drive to be used on both Mac and PC computers, you can choose this format.
ExFAT – the same as for MS-DOS (FAT) above, only this option has been optimized for flash drives – both internal and external.

Step 3. Choose the security option.
The security options allow you to erase the selected drive or volume to prevent disk recovery software from recovering data. The fastest option will erase the USB drive by removing the header information and leaving files intact. The Secure option writes over the drive data 7 times to avoid recovering data.
The higher security you choose, the less possibility to recover the formatted drive. If you have backed up the files of your USB drive or you plan to sell or give the drive to other people, you can select the Most Secure option.

Step 4. Format USB drive on Mac.
The last step to format the USB drive on Mac is clicking the Erase button. Then a progress bar will show how the formatting of your USB drive is going and how long it will take to complete. Wait patiently or do something else during the process.

After formatting, click “Done” and your USB drive is ready for new files. If you format a USB on Mac by accident and want to find a solution to recover lost files from it, below is the right guide.
How to Recover Data from An Accidentally Formatted USB Drive on Mac?
As long as you haven’t added new files to the formatted USB drive, you still have a chance to recover the lost data by using a third-party data recovery application like MacDeed Data Recovery.
MacDeed Data Recovery is a piece of Mac data recovery software that can help you recover lost, deleted, or formatted data like photos, videos, documents, and archives from USB drives, hard drives, SD cards, etc. Follow the below steps to recover data from a formatted USB drive.
Step 1. Download MacDeed Data Recovery for free. And install it on your Mac. Don’t install it on the formatted USB drive. Then launch it.
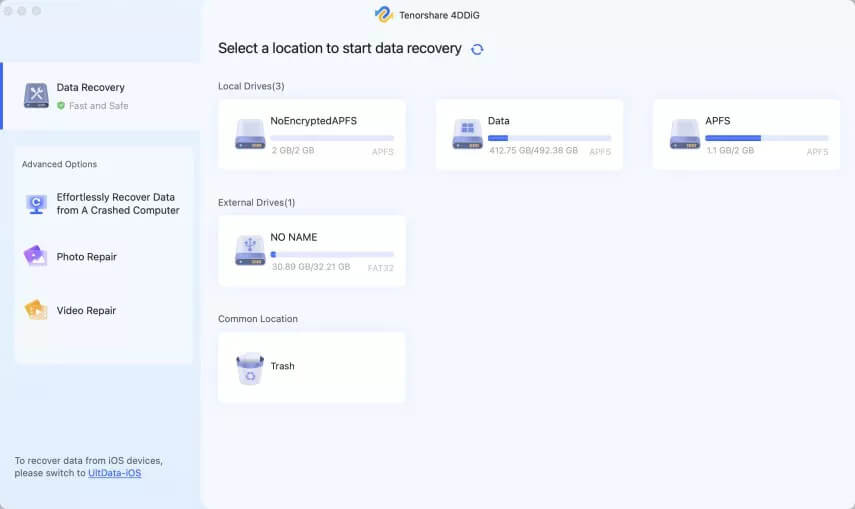
Step 2. Choose the formatted USB to scan. And click “Scan”. This data recovery software will scan the whole formatted USB drive.
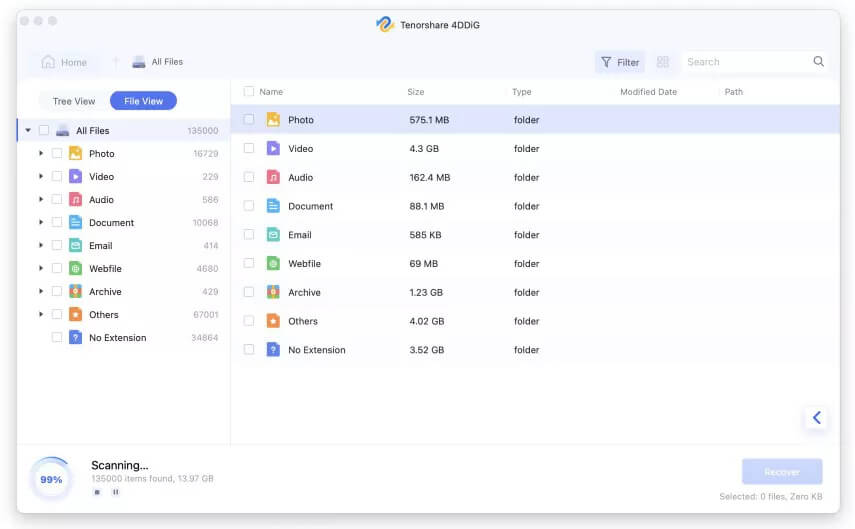
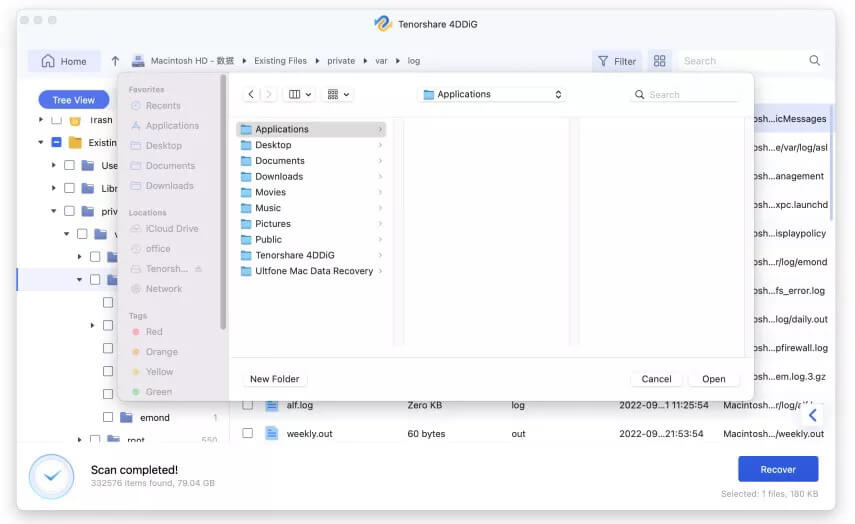
Step 3. Preview and recover lost data. After scanning, you can click each file to preview. Then select the files you want to recover and hit “Recover” to save them on your selected location. Don’t select the USB drive to store recovered files.
Conclusion
It is very easy to format a USB drive on Mac by using Disk Utility. And if you format a USB accidentally, try MacDeed Data Recovery to recover data from the formatted USB drive. Download it right now to see how many lost files can be found on your USB drive.