Is your Windows system running slow or have accumulated a lot of temporary files? How to delete temporary files on a PC?
Don’t worry – you can easily resolve this situation and delete temp files from your system. Ideally, temp files are created by programs to provide a better user experience and improve their processing.
Though, the accumulation of a lot of temporary data on your system might take a toll on its storage or make it slow. To fix this situation, you can just delete temporary files from Windows. In this guide, we will teach you how to do the same and even recover deleted temp files afterward.
Part 1: Where Are Temp Files Stored?
As the name suggests, temp files contain temporarily stored data that is created by different programs and applications while running on a Windows system.
They would store certain bits of information and details of the application to improve its working and make it process faster. Therefore, the temporary files are mostly stored on the Windows drive (C:) or where the application has been installed.
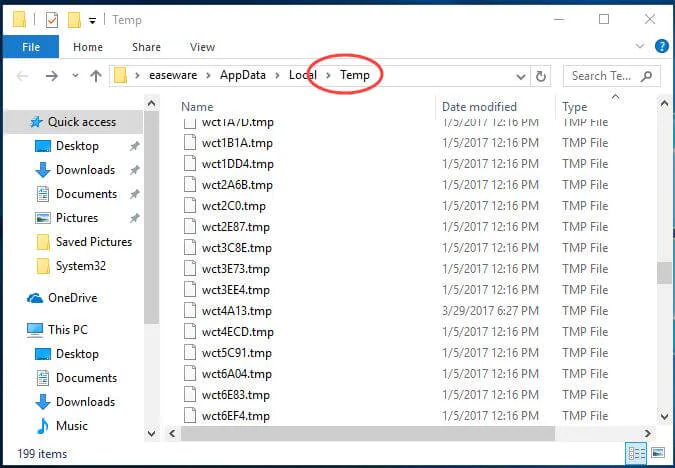
To check the location of these temporary files, you can go to the Windows Drive > AppData > Local folder. Here, you can see a “Temp” folder where these files would be stored with a .tmp extension. Alternatively, you can also go to Explorer, open any partition, and look for the “.tmp” files to check their exact location as well.
Part 2: How to Delete Temporary Files Windows 10?
The simplest way to delete Windows temp files is by visiting the location where the files are stored and remove them manually. Though, Windows 10 also provides us with several other solutions to delete temporary files from it. Here are the two most popular and smartest ways to delete Windows temp content.
Method 1: From Windows 11/10 Settings
With the updated Windows 10 interface, most of the options are available in its settings. Therefore, if you don’t want to go to individual locations, then simply delete temp files from multiple sources the following way.
Step 1. Firstly, go to the Start menu and visit the Windows 10 Settings from there. From the sidebar, you can visit the Storage settings.
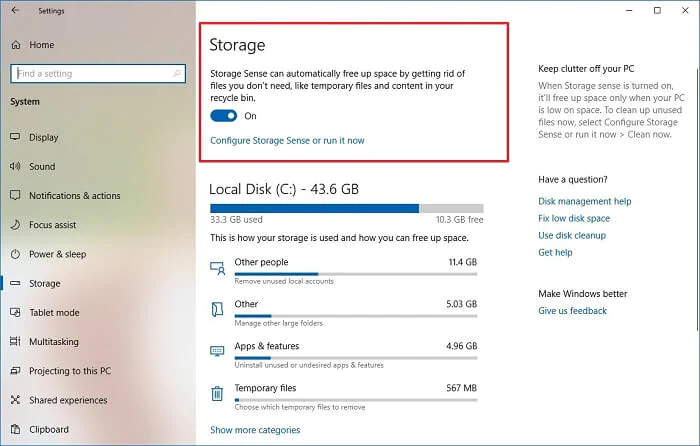
Step 2. Here, you can see how the storage has been occupied by different types of data. Under the Windows (C:) drive section, visit the “Temporary Files” option.

Step 3. This will display all the temporarily stored data on your Windows 10 with their storage details. Simply select the type of data you wish to delete (or select all) and click on the “Remove” button.
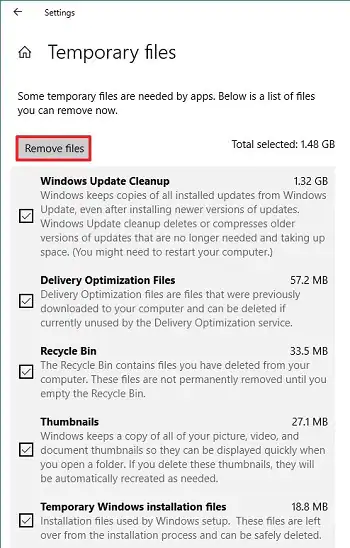
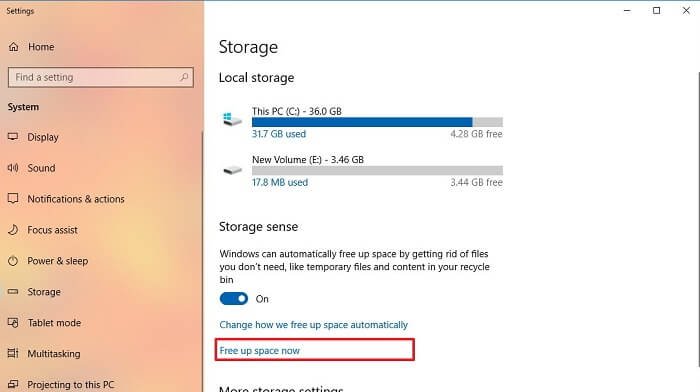
Step 4. If you are using an older version of Windows 10, then you need to visit the “Free up space” section under storage settings to get this option.
Step 5. Windows 10 also provides a hassle-free solution to automatically delete temporary files as well. Just enable the Storage Sense option from the Storage Settings to automatically delete temp files from dormant apps in 30 days.
Method 2: Delete temp files via Disk Cleanup
As you can see, Windows 10 provides a hassle-free solution to delete temp files together. Apart from that, you can also take the assistance of the native Disk Cleanup feature to delete temporary files from a specific drive/partition as well. To delete the temp folder via Disk Cleanup, follow these steps.
Step 1. Launch the Windows Explorer and go to the My Computer/This PC section. Select the drive where temp files are stored (mostly C: drive).
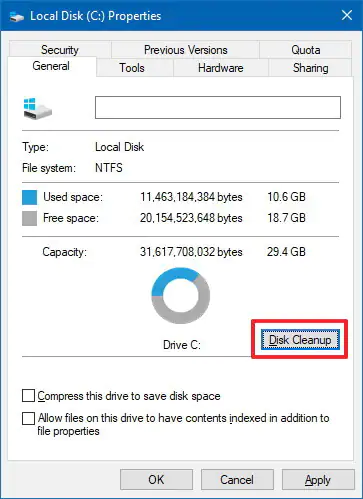
Step 2. Right-click the disk icon and go to its Properties > General > Disk Cleanup.
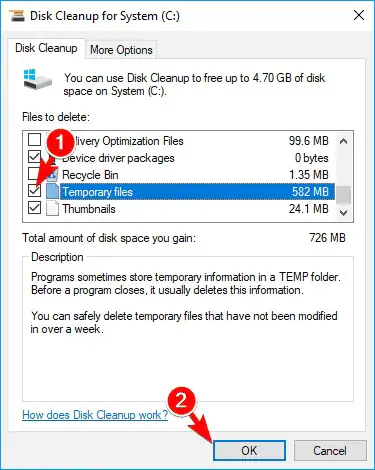
Step 3. This will open a dedicated Disk Cleanup pop-up window on the system. From here, just select the temp files option and click on the “Ok” button to delete all the saved temporary data from the drive.
Part 3: How Do I Recover Permanently Deleted Temp Files?
There are times when we end up deleting some important temporary files by mistake. If the temp files have been removed from the Recycle Bin as well, then you need to take some drastic steps to get them back.
For instance, you can take the assistance of MacDeed Data Recovery which can recover every kind of lost or deleted data from a Windows system.
It supports every leading version of OS like Windows XP, Vista, 7, 8, and 10. The tool is known for its high data recovery rate and has an extremely user-friendly interface.
MacDeed Data Recovery – Best Software to Undelete Temp Files
- The basic version of MacDeed Data Recovery is available for free, which comes with a certain data limit.
- You can recover more than a thousand different data types, including the .tmp files.
- The tool would yield exceptional results under every data loss scenario like accidental deletion, formatted drive, lost partition, Recycle Bin deletion, and more.
- Since the interface is so easy to use, no prior technical knowledge is needed to operate it.
- Apart from Windows partitions, it can also recover data from several other external sources as well.
Here’s how you can recover deleted temp files from your Windows using MacDeed Data Recovery.
Step 1. Select the Windows partition
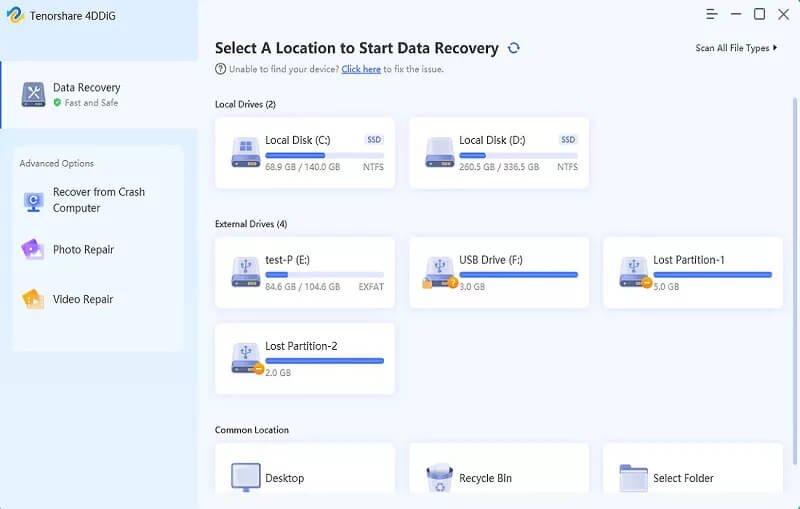
If you lose some temp files, launch MacDeed Data Recovery on your system. From its home, select the location from where the temp files are lost. In this case, it will be the Windows (C:) partition.
Step 2. Scan for temp files
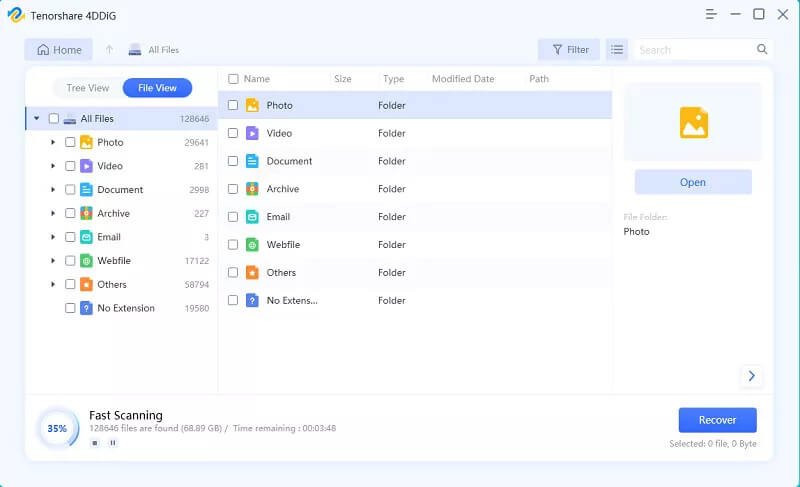
Click on the “Start” button and just wait for a while as the application would look for all kinds of lost and deleted data. It is recommended to let the tool complete the process to get the expected results.
Step 3. Recover your temp files
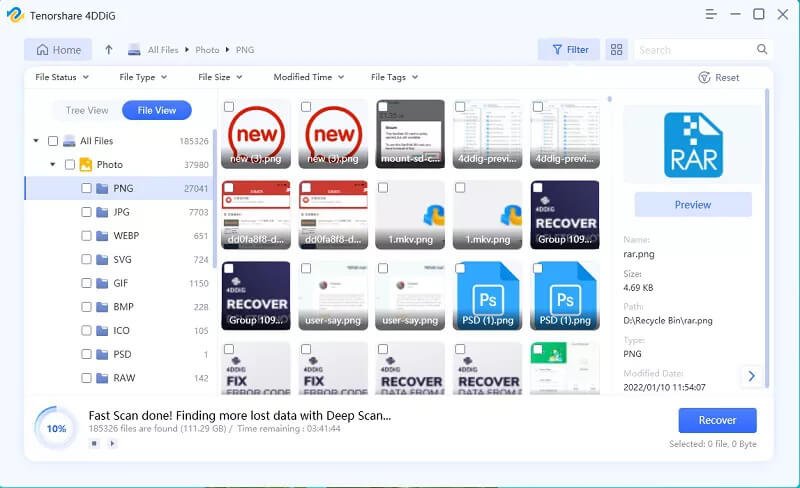
When the process is complete, you can see the results and select the relevant temp files that you wish to get back. Click on the “Recover” button after selecting them and save these files to a secure location.
Tips: How to Avoid Deleting Important Temp Files
If you don’t want to suffer from the unwanted loss of some important temp files, then follow these tips.
- Try not to use Shift + Delete while erasing something since it would skip the Recycle Bin.
- You can lock certain important folders so that you won’t end up deleting them by mistake.
- Enable the firewall on your system or use an antivirus to make sure malware won’t corrupt your temp files.
- Avoid connecting unreliable devices or using a public WiFi network on your system to keep it secure.
- Keep your system updated with all the necessary patches and security upgrades.
- Avoid the sharing of your system’s resources and its hard drive with another computer to prevent the overwriting of temp details.
Conclusion
Now that you know how to delete temp files from your Windows system, you can easily make more space on it. We have provided not one, but two ways to delete temporary files on Windows and even automate the process.
Apart from that, you can take the assistance of MacDeed Data Recovery to recover deleted temp files. It is an exceptional recovery tool that can get back all kinds of lost content under every possible data loss scenario.

